

")
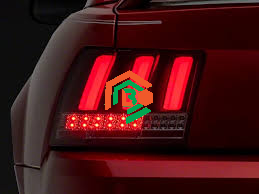
Upgrading your 1992 Corvette tail lights to LEDs is a great way to enhance visibility, improve aesthetics, and ensure longer-lasting performance. However, when you switch to LED lights, you may experience hyper-flashing or malfunctioning turn signals. The solution? Installing a load resistor. Before you can do that, you need to remove the factory tail lights properly. In this guide, we’ll walk you through the process step by step, ensuring a smooth and hassle-free installation.
Why Do You Need to Remove 1992 Corvette Tail Lights?
There are several reasons why you might need to remove the tail lights on your 1992 Corvette:
- Upgrading to LED lights – LED lights are brighter, more energy-efficient, and last longer than traditional halogen bulbs.
- Fixing hyper-flashing issues – When you replace factory bulbs with LEDs, the turn signals may blink too fast due to low resistance. Installing a load resistor corrects this issue.
- Replacing damaged tail lights – Over time, tail lights can become cracked or faded, affecting visibility and safety.
- Fixing electrical issues – If your tail lights are flickering or not working properly, you may need to check the wiring behind them.
Removing the 1992 Corvette’s tail lights is a straightforward process, but it’s essential to follow the correct steps to avoid damaging the housing or electrical components.
Tools You Need for Tail Light Removal
Before you start, gather the necessary tools to make the process smooth and hassle-free:
- Flathead screwdriver – Helps in prying out clips and connectors.
- Phillips screwdriver – Required to remove screws holding the tail light assembly.
- Socket wrench (preferably 10mm or 8mm) – Used for loosening bolts.
- Plastic pry tool – Helps avoid scratching the car’s paint.
- Electrical tape – Useful for securing wires after installation.
- LED load resistor kit – A must-have to prevent hyper-flashing.
- Gloves – Protects your hands while handling electrical parts.
Having these tools ready will save you time and prevent unnecessary frustration during the process.
Choosing the Right LED Load Resistor
When upgrading to LED tail lights, you must install a load resistor to maintain proper electrical balance. Choosing the right resistor is crucial to ensure your tail lights function correctly. Here’s what you need to know:

- Resistor Value: Most LED load resistors for turn signals are 50W 6Ω (ohm). This value simulates the resistance of traditional halogen bulbs.
- Compatibility: Ensure the resistor is compatible with 12V systems, which is standard in the 1992 Corvette.
- Heat Dissipation: Look for resistors with an aluminum casing as they dissipate heat more effectively, preventing overheating issues.
Where to Buy a Quality Resistor?
You can purchase high-quality LED load resistors from:
- Amazon – Wide variety and competitive pricing.
- Auto parts stores – Local options like AutoZone or O’Reilly Auto Parts.
- Online specialty retailers – Websites like SuperBrightLEDs or Diode Dynamics specialize in automotive LED solutions.
Safety Tips Before You Begin
Before working on your 1992 Corvette’s tail lights, follow these safety precautions:
✔ Disconnect the Battery: Prevents electrical shocks and avoids short circuits.
✔ Work in a Well-Lit Area: Proper lighting ensures you don’t miss any small screws or clips.
✔ Avoid Touching Bulb Surfaces: Oils from your fingers can damage LED bulbs.
✔ Let the Car Cool Down: If you’ve been driving, let the rear section cool before handling any parts.
Step-by-Step Guide to Remove 1992 Corvette Tail Lights
Now that you have everything ready, let’s get started with removing the tail lights:
- Open the Rear Hatch – This gives you access to the tail light screws.
- Locate and Remove Screws – Using a Phillips screwdriver, carefully unscrew the tail light assembly from the rear panel.
- Gently Pull Out the Tail Light – Use a plastic pry tool if necessary to avoid damaging the paint.
- Disconnect the Wiring Harness – Locate the electrical connector and carefully unplug it.
- Remove the Bulb Holder – Twist the bulb socket counterclockwise to remove it from the tail light housing.
Now that the tail light is removed, you can proceed with installing the LED load resistor.
Installing the LED Load Resistor Properly
Installing a load resistor ensures your new LED tail lights function without hyper-flashing or dashboard errors. Follow these steps:
- Identify the Turn Signal Wires – The resistor must be installed in parallel with the turn signal circuit.
- Mount the Resistor – Secure it to a metal surface using screws or adhesive tape.
- Connect the Wires – Use wire taps or soldering to attach the resistor leads to the turn signal wires.
- Insulate with Electrical Tape – Prevents short circuits and ensures durability.
Once installed, you can test the tail lights before securing everything back in place.
Common Mistakes to Avoid
Avoid these common mistakes to ensure a successful installation:
🚫 Skipping the Load Resistor – Without a resistor, your LEDs may blink too fast.
🚫 Incorrect Wiring – Double-check that the resistor is connected to the correct wires.
🚫 Placing the Resistor on Plastic – Resistors generate heat; mount them on a metal surface to prevent damage.
🚫 Not Testing Before Reassembly – Always test your lights before reinstalling the tail light assembly.
Testing the New LED Tail Lights
Once everything is connected, it’s time to test your 1992 Corvette’s new LED tail lights.
Checks & Troubleshooting
✅ Turn Signals Work Normally – No hyper-flashing or dashboard warnings.
✅ Brake Lights Illuminate Properly – Press the brake pedal and verify both lights turn on.
✅ Reverse Lights Function – Ensure they turn on when shifting into reverse.
If any issues arise, check the wiring and resistor connections before proceeding.
Step-by-Step Guide to Remove 1992 Corvette Tail Lights
(Repeat the section here in case users missed it earlier, ensuring clarity and reinforcing the process.)
The Bottom Line
Upgrading your 1992 Corvette’s tail lights to LEDs is an excellent way to modernize your vehicle while improving safety. However, to ensure proper functionality, installing a LED load resistor is essential. By carefully removing the tail lights, choosing the right resistor, and installing it correctly, you can enjoy reliable, error-free LED performance.
With this step-by-step guide, even beginners can complete the process with ease. Now, go ahead and upgrade your Corvette’s lighting system for a brighter and better driving experience!